
This will cover the many ways the cameras and recorders are configured for audio functions.
NVR Setup
NVRs will require the audio source to be from the IP cameras for recording. Audio input in the NVR is for live 2 way talk and will not record.
IP Camera and NVR hardware setup:
Step 1: IP Camera Setup: Confirm that the IP camera either has a built in microphone or audio input. If the camera has audio input, you will need a powered microphone connected to the camera (such as ICR-MIC) to receive audio. See this diagram for connecting a microphone to an audio enabled IP camera. Audio out is optional and used for 2 way talk.

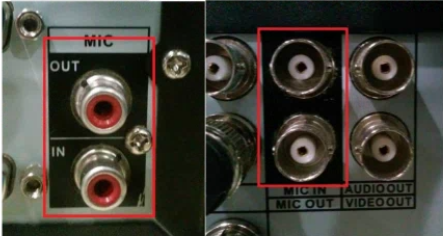
Step 2: Recorder Setup: Audio Input/ Output on NVRs are for 2 way talk only. To enable 2- way talk, connect a powered Microphone and Speaker in then Audio Input and Audio Output, respectively. Depending on the recorder type, it may be BNC or RCA connection. See the diagram below.
Local Interface Setup
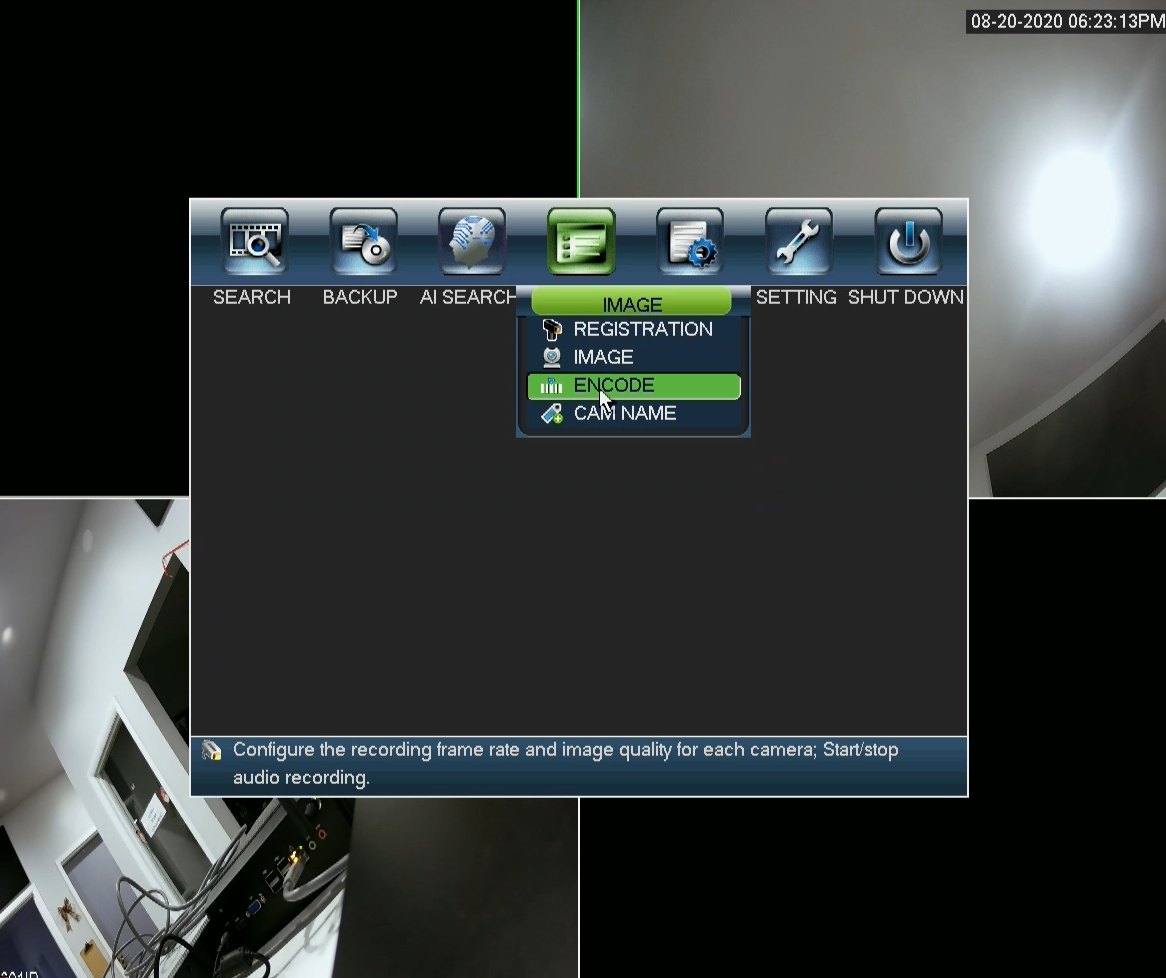
Step 1: Login to the NVR Main Menu. Under the Image or Camera section, select Encode or Audio/Video.
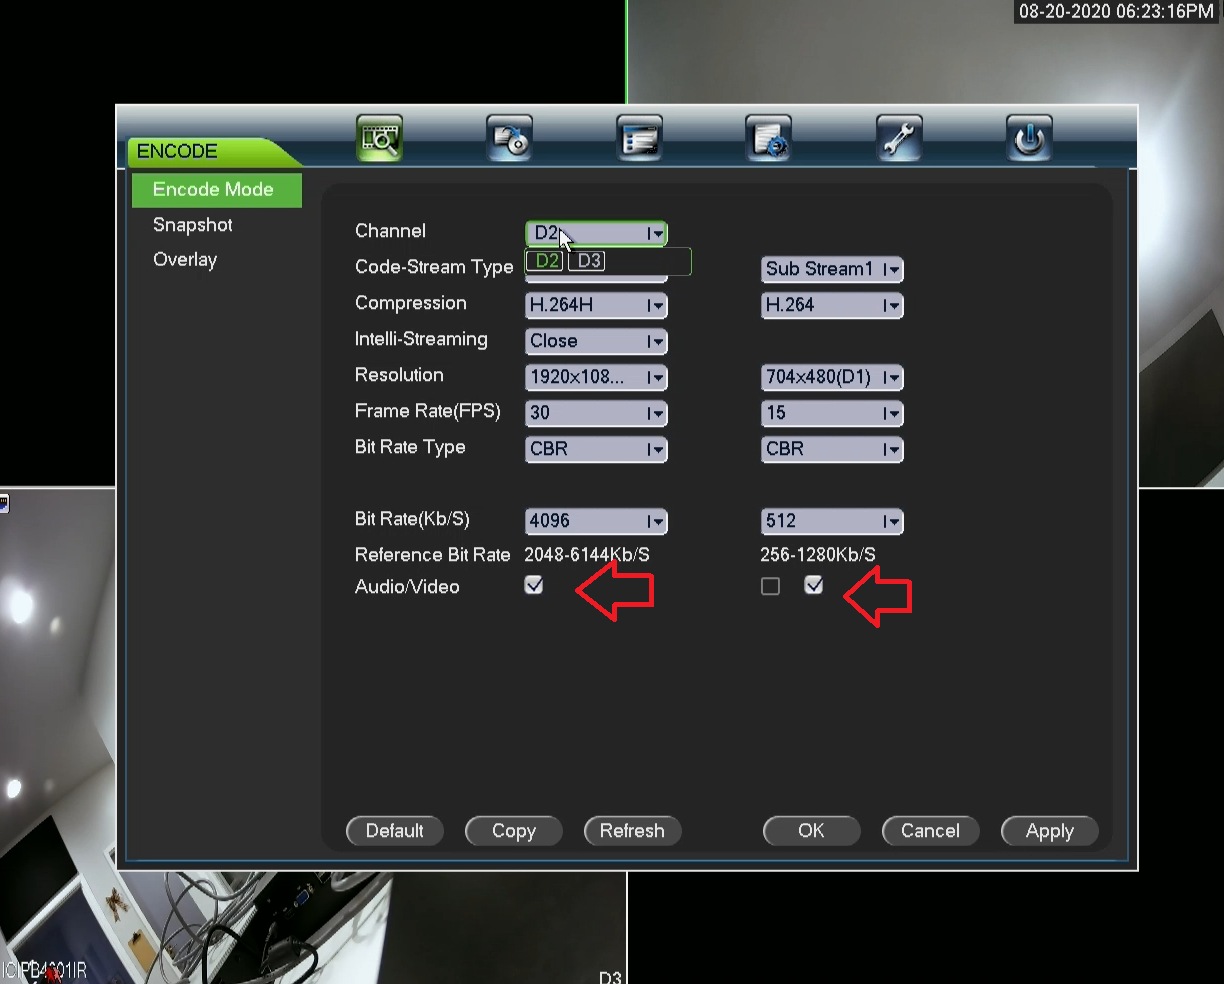
Step 2: Select the appropriate channel. Enable the audio on the Main and sub Stream.
Step 3: To listen to the audio, go to the Live view screen, select the camera and move your mouse on the top left of the image. Click on the speaker icon. If you have speakers on your HDMI monitor, it should stream the camera audio.
Web Interface
Step 1: Login to the recorder using a web browser.
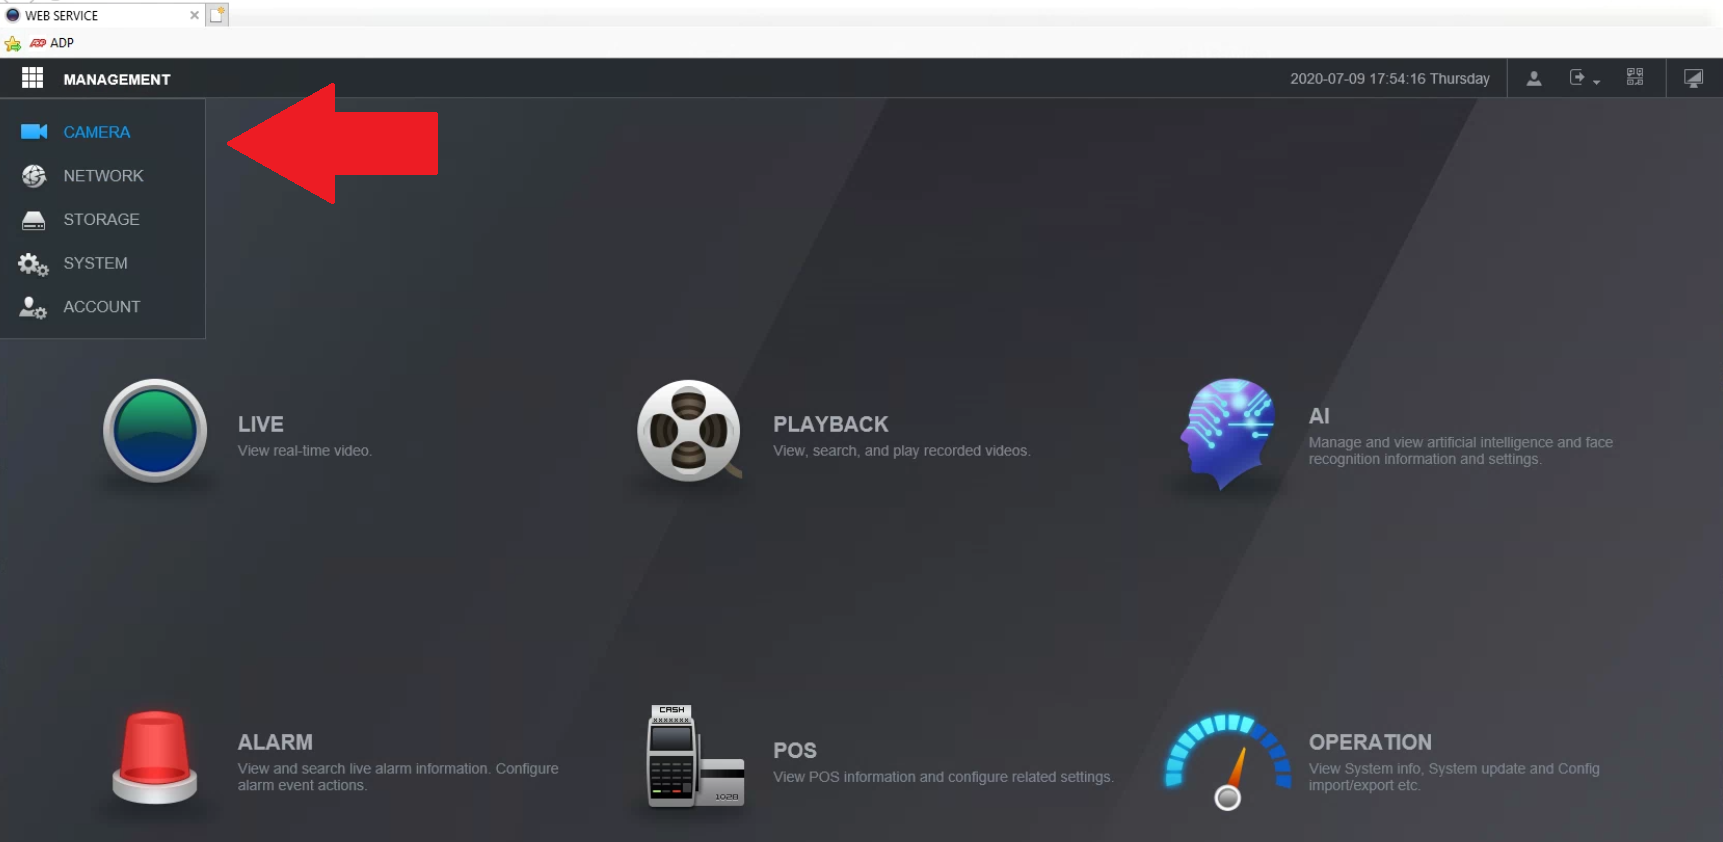
Step 2: Click on the Setup or Management tab. Under the Image or Camera section, select Encode or Audio/Video.
Step 3: Select the appropriate channel. Enable the audio. In some camera models, it may have an option to specify line-in or built in microphone audio.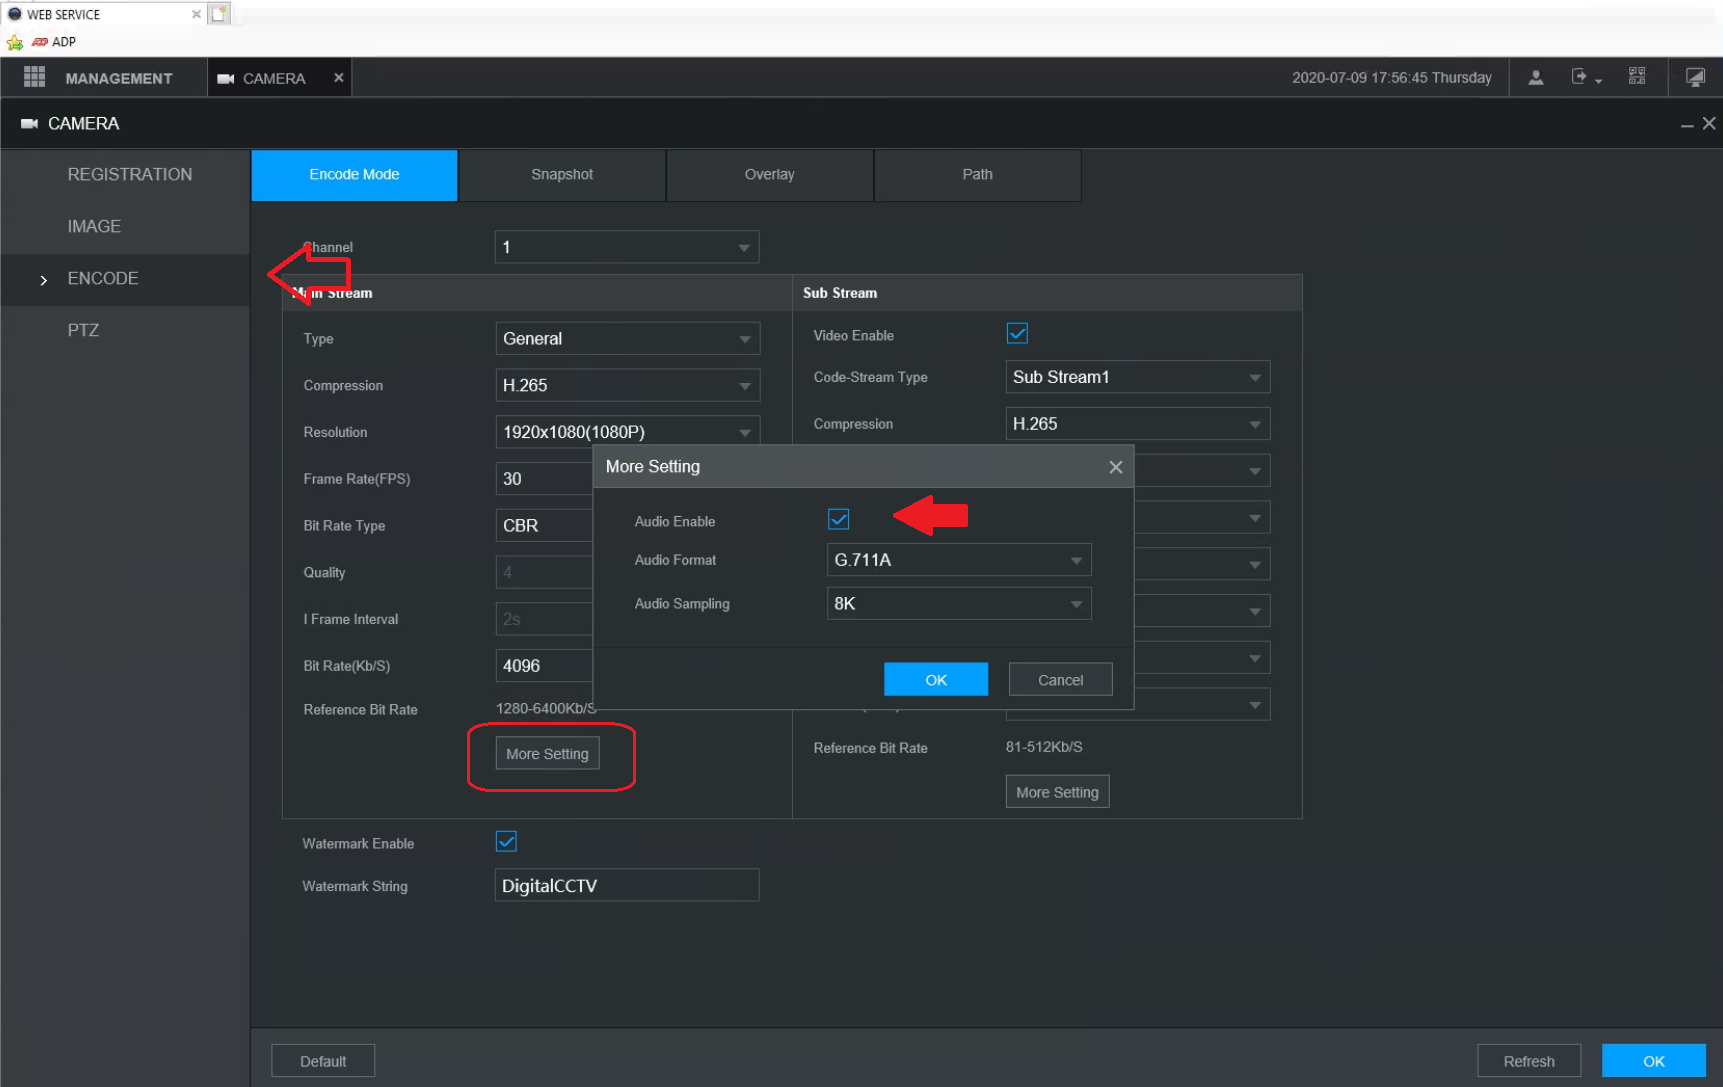
Step 4: To listen to the audio, click on the Preview tab. On the left side, select the channel. Click on the Speaker icon on the top right of the image.
Step 5: If using 2-way talk, click on the Start Talk button on the bottom left to enable 2-way talk.
AVR Setup:
AVR units can either receive audio via audio input (typically next to the channel input it is tied to) or audio over coax if the AVS camera has built in audio. This is dependent on the model of the AVRs. For example, the AVR-808S3 and AVR-816S3 models support audio over coax while other models such as the AVR-4M, AVR-1400 and AVR-1700 series do not support audio over coax
Hardware Setup
Step 1: Recorder Setup: If your AVR model does not accept audio over coax, you will need to locate the Audio inputs in the back of the AVR. There are audio inputs corresponding to the channel located in the rear interface of the AVR. Connect the desired audio source to the audio input that corresponds to that channel. See blow for AVR audio inputs that correspond to coax channels.
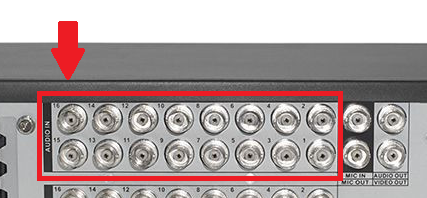
Step 2: Camera Setup. If you have an AVR that supports Audio over coax paired with an AVS camera with a built in audio, simply power up the camera and confirm the video can be seen through the AVR. If the AVS camera has a line-in for audio, this will typically be located in the pigtail of the camera. Plug in a powered mic via RCA for audio.
Local Interface Setup:
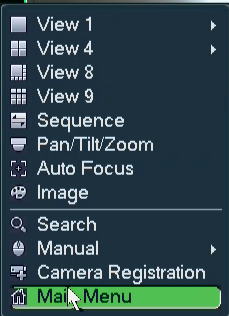
Step 1: When viewing the grid view, right click and select Main menu. Login. On the upper right side, select management. Click on Camera. From there, go to Encode or Audio/ Video.
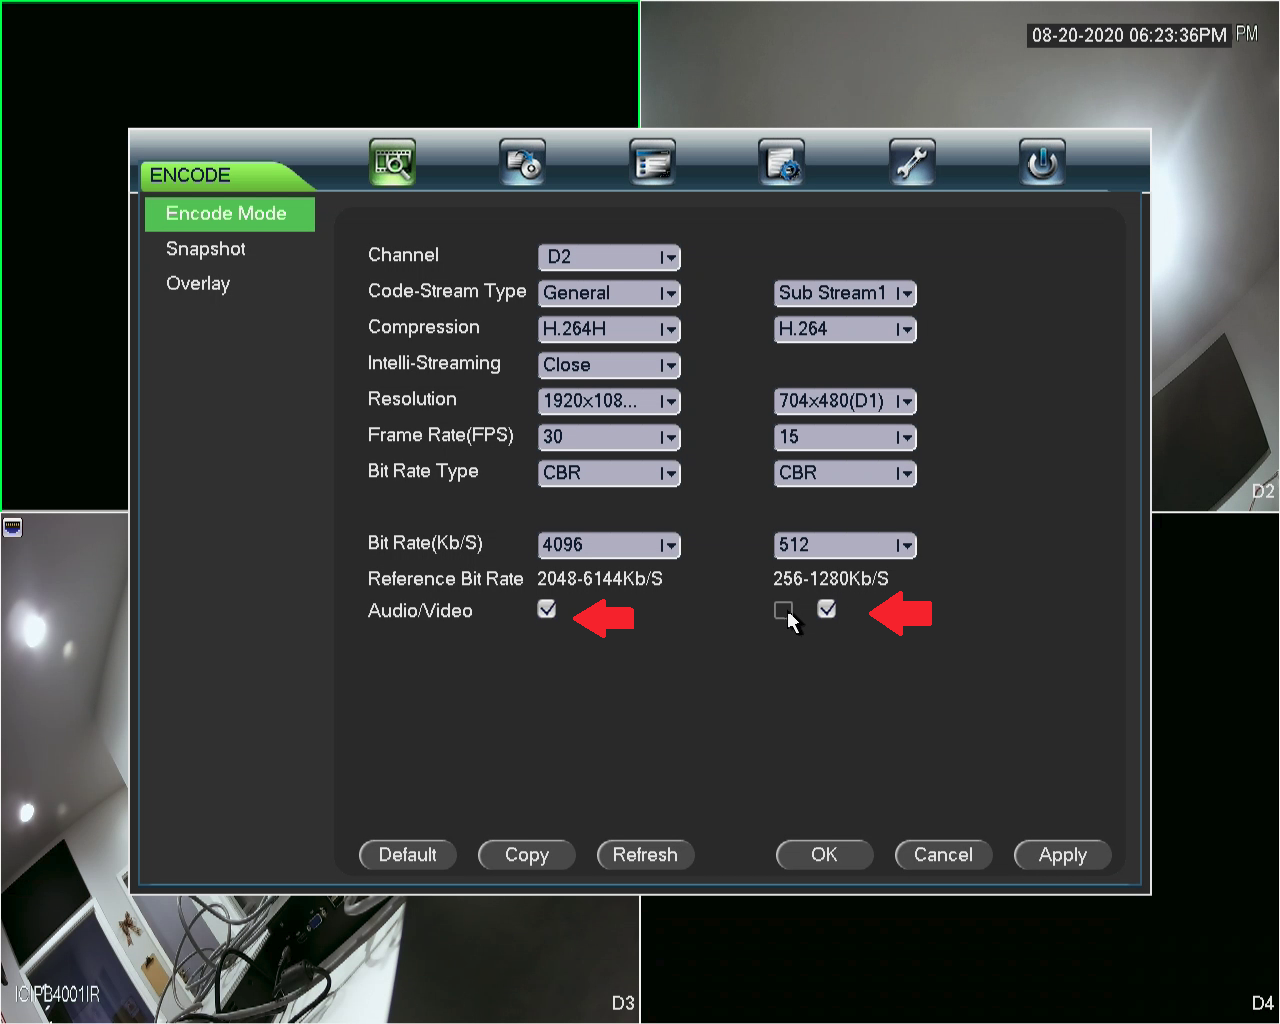
Step 2: Select the appropriate channel. Enable the audio. In some camera models, it may have an option to specify line-in or built in microphone audio.
Step 3: To listen to the audio, go to the Live view screen, select the camera and move your mouse on the top left of the image. Click on the speaker icon. If you have speakers on your HDMI monitor, it should stream the camera audio.
Web Interface
Step 1: Login to the recorder using a web browser.
Step 2: Click on the Management section on the upper left side. Click on the Camera section, select Encode or Audio/Video.
Step 3: Select the appropriate channel. Enable the audio. In some camera models, it may have an option to specify line-in or built in microphone audio.
Step 4: To listen to the audio, click on the Preview tab. On the left side, select the channel. Click on the Speaker icon on the top right of the image.
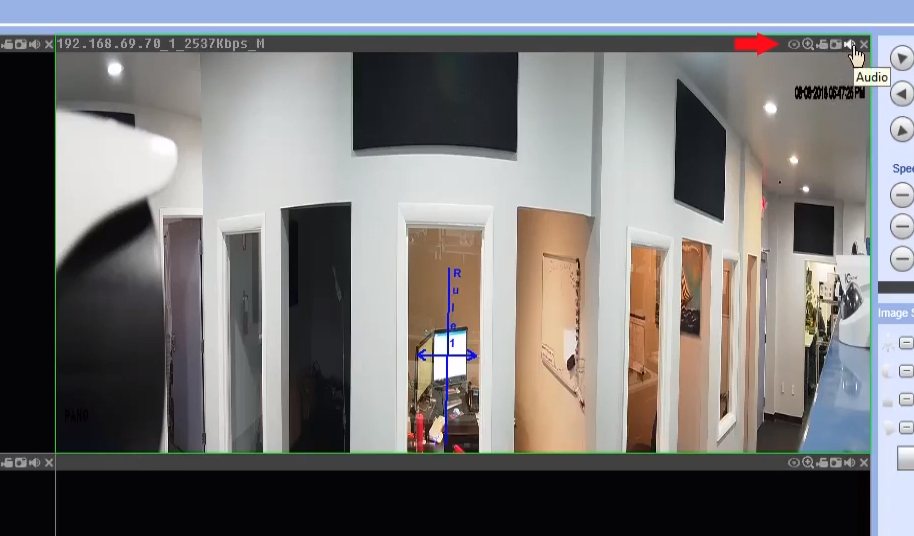
Step 5: If using 2-way talk, click on the Start Talk button on the bottom left to enable 2-way talk.
Software Interface (for NVRs and AVRs)
Step 1: Open Smart ICRSS. Click the "+" sign on the top and select Live View. Note: Make sure the software is connected to the NVR and the status is "online" in the Device section of the software.
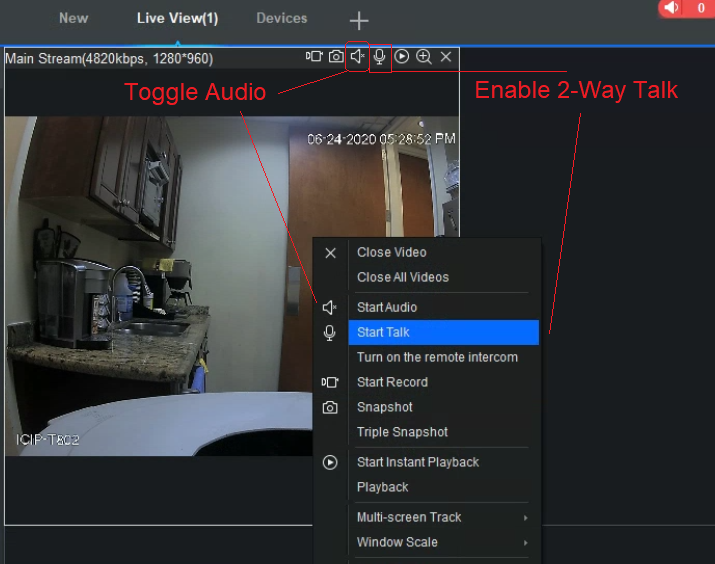
Step 2: On the Live View, select the camera to view it. Hover your mouse on the top right of the image and click on the speaker icon to enable audio. You can also right click on that camera and select Start Audio to listen to that camera or select Start Talk to enable 2-Way Talk.
Mobile App Interface (for NVRs and AVRs)
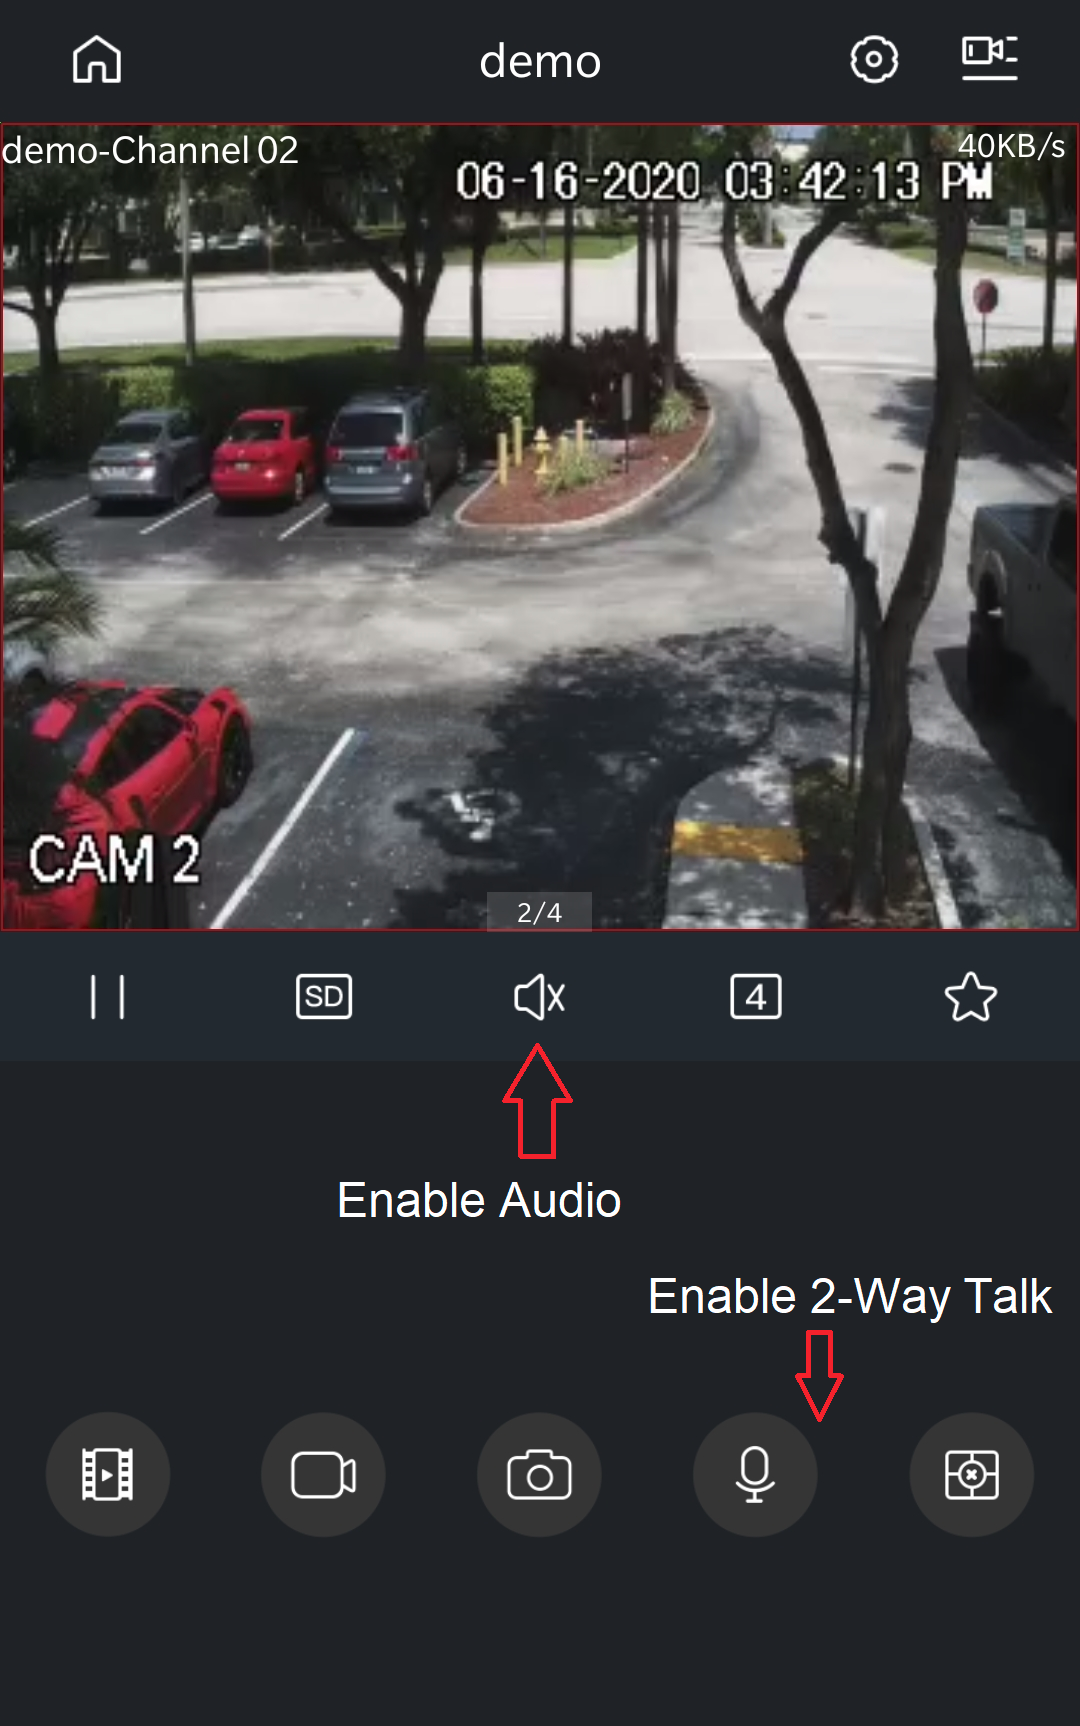
Step 1: Open the app, select"Live." Tap on the NVR/AVR and select the appropriate channel. Double tap to make the camera full screen.
Ste 2: Tap on the Speaker Icon to enable Audio. Tap on the Microphone icon to enable 2-way talk.
Comments
0 comments
Please sign in to leave a comment.